I enjoy the InVision newsletter because it includes great interviews with designers and useful tips, like this article from Andy Orsow called 7 tips for designing awesome animated GIFs.
I learned how to make animated GIFs with Photoshop at Shillington, but found the process unwieldy. I didn’t realize you could give yourself a huge head start by doing your animations as a video first. I didn’t have ScreenFlow or After Effects, so I was intrigued by Andy’s suggestion that I could use something considerably more low-tech (and probably already on YOUR computer too.)
Pro tip: If ScreenFlow or After Effects aren’t in your budget, create your animation in Keynote, and export it as a video. Yep, there’s finally a use for that setting. —@andyorsow
Here is the result of my little experiment. I made this animated GIF with Keynote and Photoshop. It was a pretty straightforward process and it was a fun way to learn something new. If you want to try it out yourself, please read on for a few more tips you might find helpful.
![]()
Set up your Keynote workspace
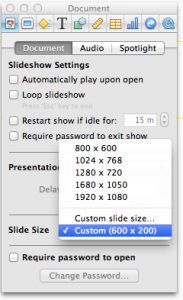
You can change the size of the “canvas” in Keynote by setting the slide size in the inspector. I choose 600×200 because that’s the width of graphics for my blog. You can pick any size that makes sense for your project.
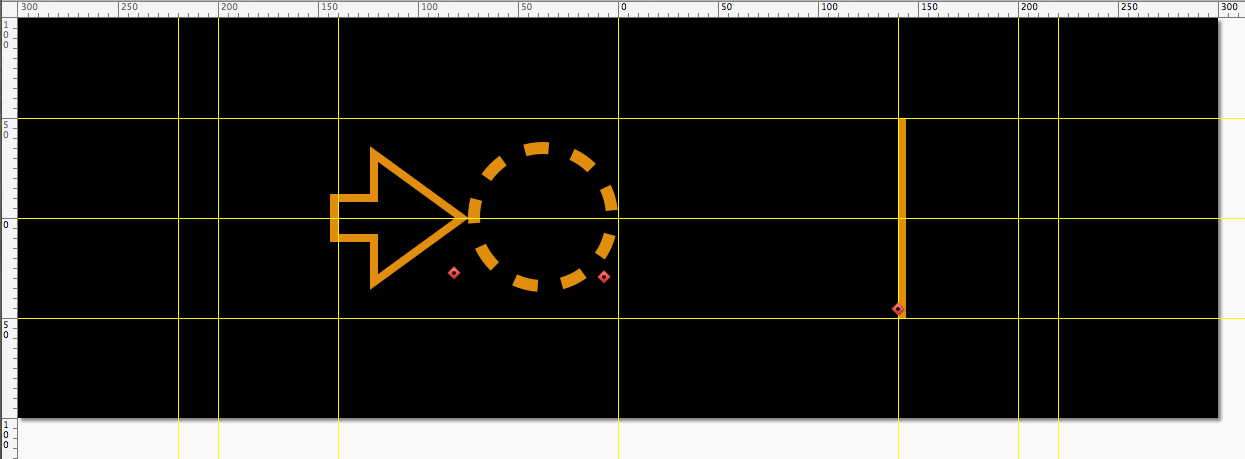
Turn on the rulers and drag some guides so you can orient yourself as you’re working.
Create your animation in Keynote
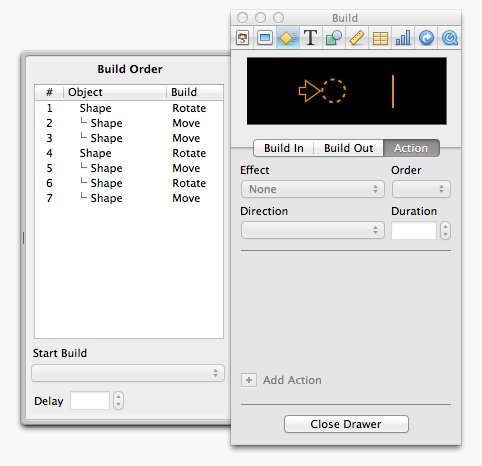
The Keynote animation settings are a little fussy to get used to but there’s a lot already built in. Everything you’ll need us under the “Build” tab of the inspector. You “group” actions by using the “Start Build” drop down, which allows you to run actions at the same time. For example, the circle rotates and moves at the same time, that’s TWO actions)
Export to Quicktime
When you’re ready, export the file to Quicktime format. I only had one slide in my deck with the animation, so I kept all the defaults (Playback Uses: Manual Advance), 24 frames per second. I just turned off Audio (not sure that was actually necessary)
Finish it up in Photoshop
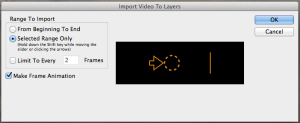
Importing the .mov file into Photoshop was pretty straightforward. File > Import > Video Frames to Layers. As Andy suggested, I chose the option “Limit To Every 2 Frames”
Once I imported the file into Photoshop, I immediately tried to Save for Web, but the GIF didn’t animate. I wasn’t sure what was wrong so the second time I imported it, I opened the animation panel (Window > Animation) and verified the playback was working before I exported.
It was better to do it that way anyhow because I could tune the animation by extending time and removing frames. I found that I needed to extend the last frame to 1 second to make the animation look like there’s a little pause before it starts.
What will YOU make?
Please leave a comment if you found this helpful or leave a link to your animated GIF project. I’d love to hear from you.